
Varenyky (Option 1)
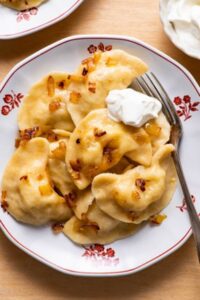
Varenyky (pronounced vah-REH-nee-key) are Ukrainian stuffed dumplings – better known stateside by their Polish name, pierogi. What Are Varenyky?These Ukrainian halfmoon-shaped stuffed dumplings can be sweet or savory, served boiled or fried, garnished with fried onions and served with sour cream, or served plain. These characteristics vary regionally and based on individual family traditions.What’s the difference between pierogi and varenyky?There is virtually no difference between Polish pierogi and Ukrainian varenyky. Both are halfmoon-shaped stuffed dumplings. However, pierogi tend to be slightly larger than varenyky.It’s important to note that “varenyky” and “pierogi” are both plural (“varenik” and “pierog” being the singular versions). Thus, “varenykys” and “pierogies” is incorrect.Varenyky FillingsThere are a handful of traditional varenyky fillings aside from this potato version. For a savory version, you can do ground meat, cooked cabbage, mushrooms, or farmer cheese (aka quark). As for sweet fillings – for breakfast or dessert – sour cherries and sweetened farmer cheese are popular.
Print Recipe
Equipment
- 1 large bowl
- 1 large pot
Ingredients
For the Dough
- 1 egg
- ⅔ cups water
- ½ tsp fine sea salt
- 2½ cups all-purpose flour plus more for dusting
For the Filling
- 2 lbs russet potatoes 3 to 4 medium, peeled and cut into ½-inch chunks
- fine sea salt to taste
- 3 tbsps extra virgin olive oil
- 2 medium yellow onions finely diced
- freshly ground pepper to taste
- unsalted butter for serving
- sour cream for serving
Instructions
Start the Dough
- In a large bowl, combine 1 egg, ⅔ cups water, and ½ tsp fine sea salt and beat with a fork to incorporate the egg in the water.
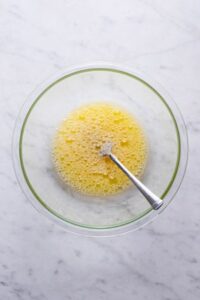
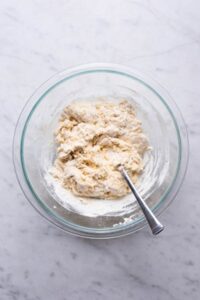
- Add 1 cup flour, mix lightly to incorporate, then add 1½ cups more flour. Combine into a shaggy dough - first working with the fork, then switching to using your hands.
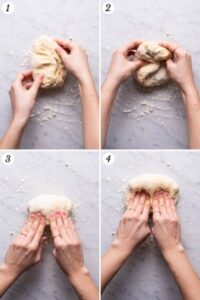
Knead the Dough
- Turn the dough out onto a floured surface and knead with your hands. giving the dough a quarter turn every now and then, for about 5 minutes.The dough is ready when it's smooth, elastic, and no longer sticky; if it's sticking to your hands, sprinkle on more flour as needed and continue kneading. Place the completed dough back in the bowl, cover loosely with a kitchen towel, and let it rest for 30 to 60 minutes.
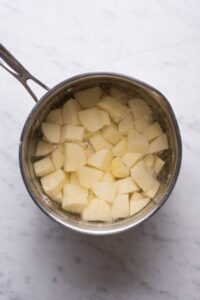
Boil the Potatoes
- While the dough is resting, peel and chop 2 lbs russet potatoes Place the potatoes in a pot with 1 teaspoon fine sea salt and enough water to cover by about 1 inch. Cover with a lid, bring to a boil, then reduce the heat to low, and simmer until the potatoes can be pierced easily with a fork, 12 to 15 minutes.
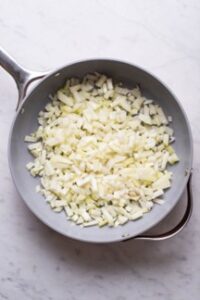
Fry the Onions
- Meanwhile, heat 3 tbsps extra virgin olive oil in a large skillet over medium high heat. Add the finely diced 2 medium yellow onions and cook, stirring frequently, until they are dark brown and a bit crispy, about 15 minutes.Important: These onions need to be dark and crispy, not simply sauteed or caramelized. To achieve this result, it is important not to skimp on the oil and to cook these over moderately high heat.
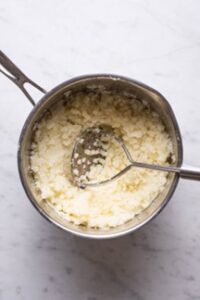
Mash and Season the Potatoes
- Drain the potatoes and return to the pot. Mash until smooth. Stir in about a third of the fried onions with their oil. Season to taste with fine sea salt and freshly ground pepper. Cool the mixture to room temperature.
Roll out the Dough
- Cut the dough ball into 4 portions. Working with one piece at a time (keeping the remaining dough covered with the towel), roll the dough between your palms into a 1-inch-thick log. On a floured surface, cut the log into 8 to 10 1-inch pieces. Lightly reshape each piece into more of a ball, then roll out into approximately a 3-inch circle with a rolling pin. If the dough is sticking to the surface of the rolling pin, dust it with more flour.

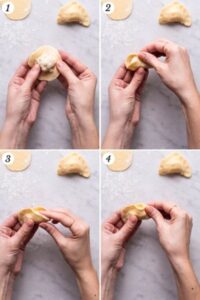
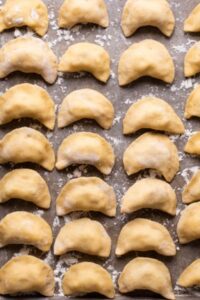
Shape the Varenyky
- Make sure that your filling has cooled to room temperature before forming the dumplings; otherwise, they will fall apart. Working with one dough circle at a time, place a heaping teaspoon of potato filling in the center. Gather the dough into a half-moon shape around the filling and pinch the top closed (squeeze hard with your fingertips), then pinch both edges closed. Place the shaped varenyk on a generously-floured baking sheet or cutting board, and continue filling the rest. Make sure the varnyky are not touching or they will stick together.Note: You may need to pinch slightly harder than you think. Think of the motion almost as crushing a tiny bug between your thumb and index fingers.
Boil the Varenyky
- Bring a large pot of water to a boil and salt it generously. Boil the varenyky in batches (to prevent them from sticking together). Cook them for a few minutes, just until they float up to the surface. Once they have floated up and the water has returned to a steady simmer, cook them for another minute. (Do not overcook, as the filling may escape the dough).Using a small mesh strainer or a slotted spoon, fish the varenyhky out and place in a large bowl. Immediately add a pat of unsalted butter and gently toss to prevent the varenyky from sticking together. Continue cooking the remaining varenyky. At the end, add the remaining fried onions to the bowl and toss to coat.
Serve the Varenyky
- Serve immediately, with sour cream.
Notes
Reheating and Freezing Varenyky
Freshly-boiled varenyky are best eaten right away, while the dough is still tender and the filling hot. I recommend reheating leftovers in a skillet instead of the microwave, since varenyky are great when they’re a little crispy!
To freeze: once the dumplings are formed, arrange them on a flour-coated tray or baking sheet, and place it in the freezer. When the varenyky are completely frozen (after at least a couple of hours or overnight), transfer them to an airtight bag/container and freeze for up to 6 months. To cook, boil them as instructed, although they will need slightly more time in the pot than fresh varenyky.
Cooking Tip
Homemade varenyky are a labor-intensive pursuit. Although it’s a relatively simple project, it does require a sizable time investment, so it’s easier, faster, and more fun to do it as a group – with someone on dough-rolling duty and others on filling duty. In fact, I advise doubling the recipe and freezing half of the varenyky for later.
Nutrition
Serving: 10varenyky | Calories: 450kcal | Protein: 11.5g | Fiber: 7.1g